How to set up an Android web server
Step-by-step guide to hosting a website with a regular Android phone.
The goal of this guide is to host a static website on the public web using an Android phone. It will be accessible on the local network through SSH, run the Caddy web server, and connect to the public web through Cloudflare Tunnels.
Many of the steps include choices I made for my situation, which are not strictly necessary. I call those out along the way so you can adapt these instructions for your own needs.
- Preparation
- Phone setup
- Install other software
- Cloudflare tunnels
- Set up Caddy web server
- Putting it all together
- Optional: Multiple websites
- Optional: Set up SD card storage
Preparation
You will need an Android phone running Android 7.0 or higher, a Cloudflare account, and a web domain from a domain registrar (or from Cloudflare).
You need Android 7.0 or higher to run Termux. It’s estimated that 96.6% of all Android phones have Android 7.0 or higher, so really any Android phone can do this. But the phone you choose will constrain what this is good for.
In my case, I chose the Samsung Galaxy S9 because it has a USB-C port with USB 3.1. That allows the phone to connect to the internet over wired ethernet with an adapter (this one from j5create). It also has a microSD slot in the SIM tray which gives me expanded storage for when my hosting needs grow.
Recommended: Static IP Give your phone an assigned IP on your home network. All of the “remote management” that I do is on the local network and it’s much nicer for the server phone to have a fixed IP, otherwise you’ll have to look it up every time you want to connect remotely. Consult the instructions for your router for how to do this.
Recommended: LineageOS Since you don’t need the Play Store or Google Play Services, I suggest replacing the operating system with LineageOS if your device is supported. (Aside: LineageOS optionally let’s you install the Play Store) This gives you a cleaner device without Google services running in the background, and you won’t have to remove/disable those services later. You might even get an upgraded version of Android out of the deal.
Optional: Disable phone locking If the phone has a password, pin, or pattern lock, you may have to unlock it after a reboot for our services to start automatically. If it has no lock, the server will start when the phone boots without having to unlock it.
Phone setup
Assuming you have the phone, operating system, and dongles you need, let’s begin.
Step 1: Install F-Droid
The first thing you need to do is download and install F-Droid, the open source Android app store. Download the F-Droid application package: https://f-droid.org/F-Droid.apk.
When it has downloaded, tap on the download from the notification center or tap on it from your downloads folder in the Files app.
Since the F-Droid app package came from outside of the Google Play Store, there is an extra step. You’ll be prompted to grant permission to allow installation of app packages from “Unknown Sources” from your browser, which you’ll need to allow. You can disable this permission after F-Droid is installed because we won’t download any more app packages from the web browser.
For the official instructions and to double-check the F-Droid download URL, see Get F-Droid.
Step 2: Download Termux and extensions
With F-Droid installed, we’re ready to download Termux. Termux runs Alpine Linux as an Android application. It’s the foundation of everything we do in this tutorial. Running Linux as a sandboxed Android application comes with quirks and limitations, which we’ll address along the way.
Here is the link to download Termux on F-Droid: Termux on F-Droid
When you install this, you will have to allow F-Droid to install app packages from “Unknown Sources” just like we did to allow F-Droid to be installed from our web browser.
Once installed, launch Termux so that the application can initialize itself.
Next, we need a way to start applications when the phone is turned on and boots up, like our web server. For that, we use an extension for Termux called Termux:Boot. Go ahead and download Termux:Boot from F-Droid.
Once it’s installed, launch Termux:Boot. You only needed to launch Termux:Boot once, after which it will run on it’s own. Later we’ll add scripts to a special folder that Termux:Boot will run at boot time.
Step 3: Modify the Android power settings
We don’t want the phone to reduce or throttle the processor’s speed for any reason, and we want to make sure that both Termux and Termux:Boot are exempt from any power restrictions.
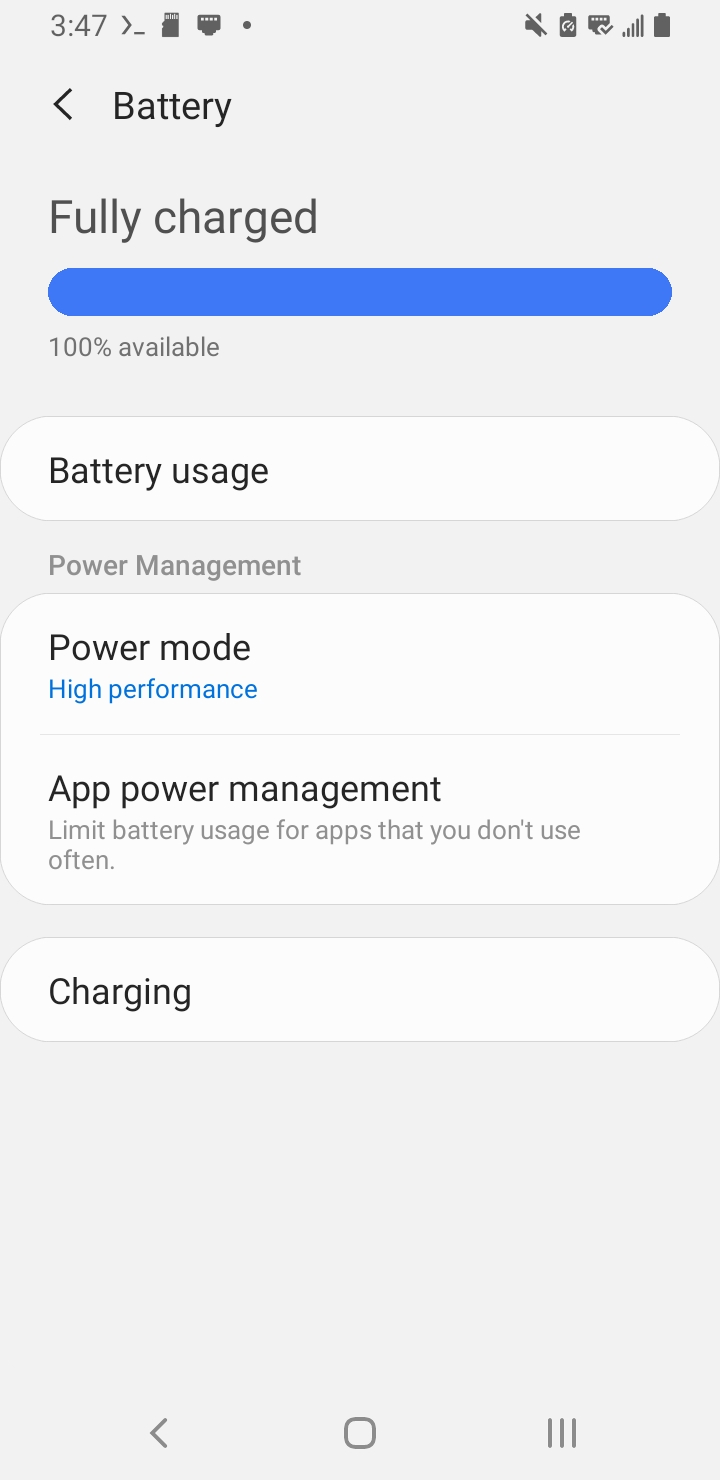
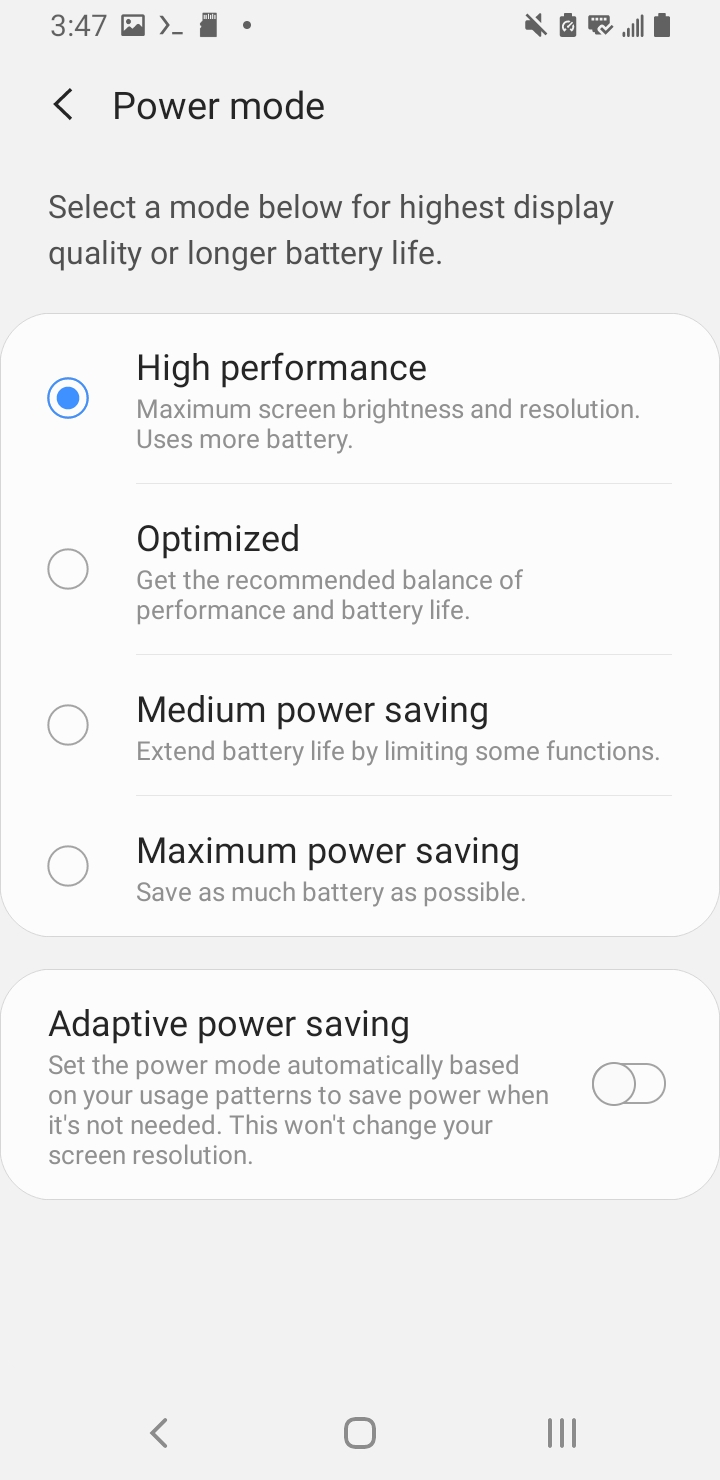
First navigate to the Battery settings in the Android Settings app and select “Power mode”. The Power mode page offers options about how to optimize power versus performance. Since we want no throttling, select “High performance” and then return to the Battery page.
 |
 |
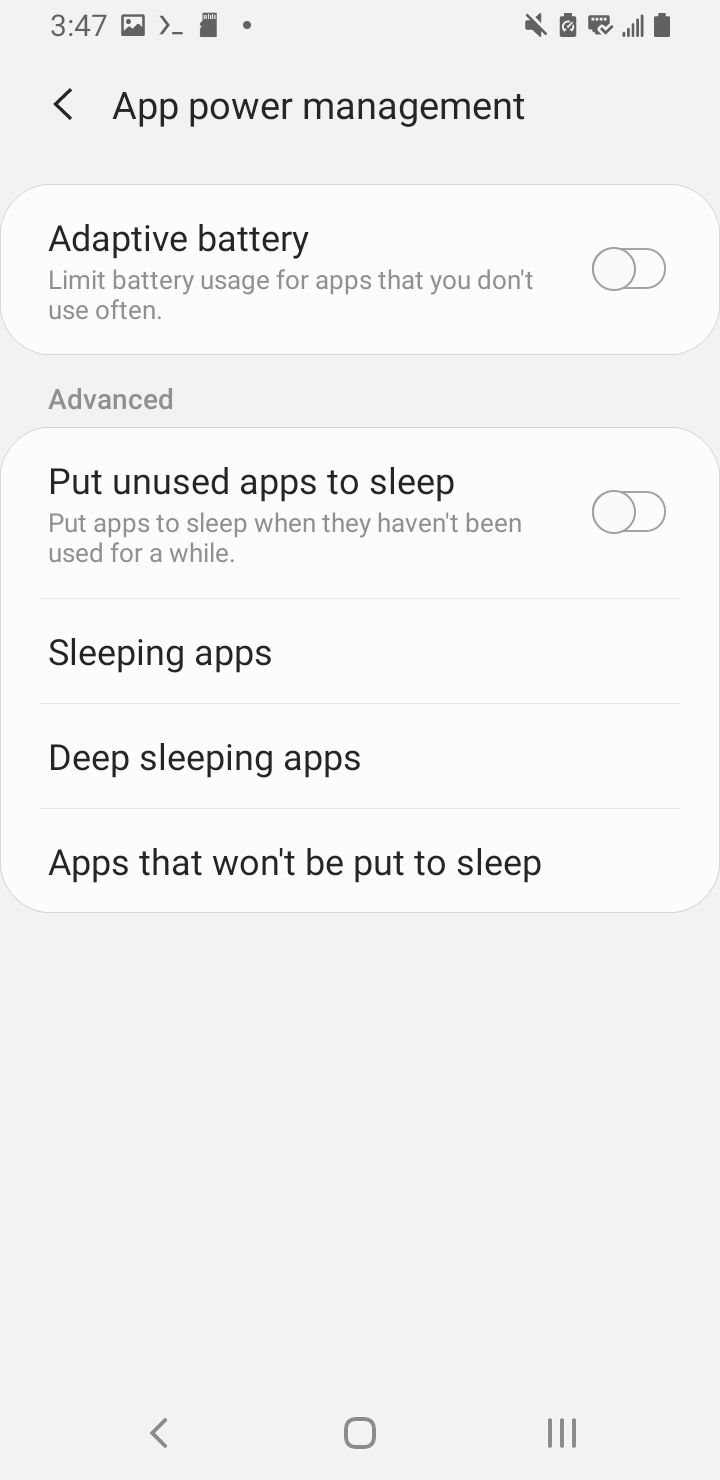
Back on the Battery page, tap on “App power management”. On the App power management page, disable Adaptive Battery, and then tap on “Apps that won’t be put to sleep”. Tap on the plus (“+”) button and select Termux:Boot. I didn’t see Termux as an option here, but if you do, add Termux as well.
|
 |
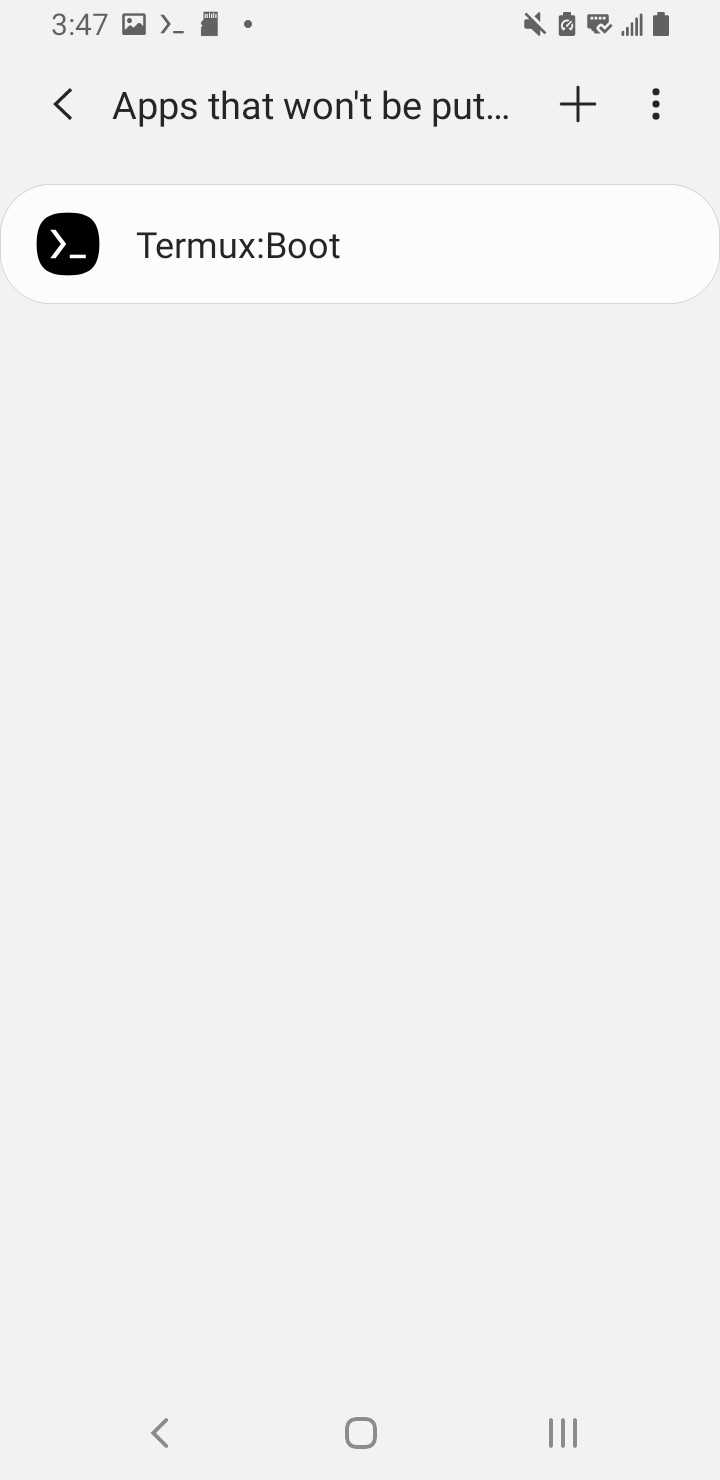 |
Taken together, these settings prevent your phone from throttling or putting an app to sleep because of any power-related concerns.
Step 4: Set up SSH in Termux
Typing commands on a smartphone is terrible, so let’s set up SSH to handle the rest of the steps using a computer with a keyboard
First we launch Termux and install the SSH server using the command pkg install sshd.
One of the quirks of Termux is that, unlike most any Linux or Unix-like enviroment, it only has a single user. The username of the user is assigned and cannot be changed. It starts with u0_ and has 3-4 characters after it. Look up this username with the command whoami and write it down.
By default, the user has no password set up, but we’ll need a password to log in remotely. Type passwd to configure a password for the user.
Once you know the username and password of the Termux user, run sshd to start the SSH server.
Note! Termux’s SSH server runs on port 8022 instead of the usual 22.
Log in from another computer to verify that all your information is correct including the username, password, port number, and the phone’s IP address.
When you’re satisfied everything is working, type Control-C from the phone to stop the SSH server.
Step 4: Start the SSH server on boot
We don’t want to manually start the SSH server every time the phone turns on, and this is why we installed Termux:Boot. Launch Termux:Boot if you haven’t already.
Now open Termux and type mkdir ~/.termux/boot. Termux:Boot executes any scripts in that folder when the device boots.
Our first script will be to launch the SSH server which we’ll call “start-sshd”. Create the file by typing nano ~/.termux/boot/start-sshd.
Enter the following into the file:
#!/data/data/com.termux/files/usr/bin/sh
termux-wake-lock
sshd
Note: Every script we add to the ~/.termux/boot directory starts with the command
termux-wake-lock. A “wake lock” is an Android term where an application tells the system that it should not go to sleep while it’s running.
Now save the file and make it executable by typing chmod +x ~/.termux/boot/start-sshd.
Exit your SSH session and then turn the phone off and back on again. Be patient with Termux:Boot. It may take a couple of minutes after the phone boots up to run your scripts.
Try to log in to the phone from another computer to make sure it works.
If you’re not able to connect to the SSH server, I suggest manually executing the start-sshd script that you created by typing ~/.termux/boot/start-sshd on the phone to run it. This will verify that the script is executable and free from errors.
Step 4b (Optional): Use SSH keys to log in without a password
With a working SSH server that launches at boot, we can handle most of the rest of the setup on a computer with a real keyboard. There will be a lot of logging in and out of our phone, so let’s make that as easy as possible. I named the phone “gs9” and now all I have to do is type ssh gs9 to connect to the phone.
If you’ve never done this on a machine before, you’ll need to generate a cryptographic key to identify your computer. Use the command ssh-keygen -t rsa -P "" to create a public and private key pair.
Then you’ll need to copy your public key to the target machine, which identifies you to the other machine.
ssh-copy-id -p 8022 -i id_rsa [local IP of your phone]
Now that the keys have been exchanged between the phone and your host machine, you can use the key to login without a password.
On your computer, edit the file at ~/.ssh/config. If there is no ~/.ssh/config file, create one and add the following:
Host [Custom host name e.g. gs9]
	HostName [DeviceIP]
	Port 8022
	User [Your username (u0_XXXX)]
	IdentityFile ~/.ssh/id_rsa
Test the connection by typing ssh [host name] and make sure everything works.
Install other software
At this point we have an Android phone with wired internet that’s accessible locally with SSH. Today is a good day!
We’ll continue with setting up the Caddy web server, but first, let’s take advantage of having a real keyboard to install other useful software.
I prefer the fish shell because it comes with auto-completions out of the box. That’s especially important if I ever have to type anything in Termux on the phone. So I install fish with pkg install fish and make it my default shell with chsh -s /data/data/com.termux/files/usr/bin/fish.
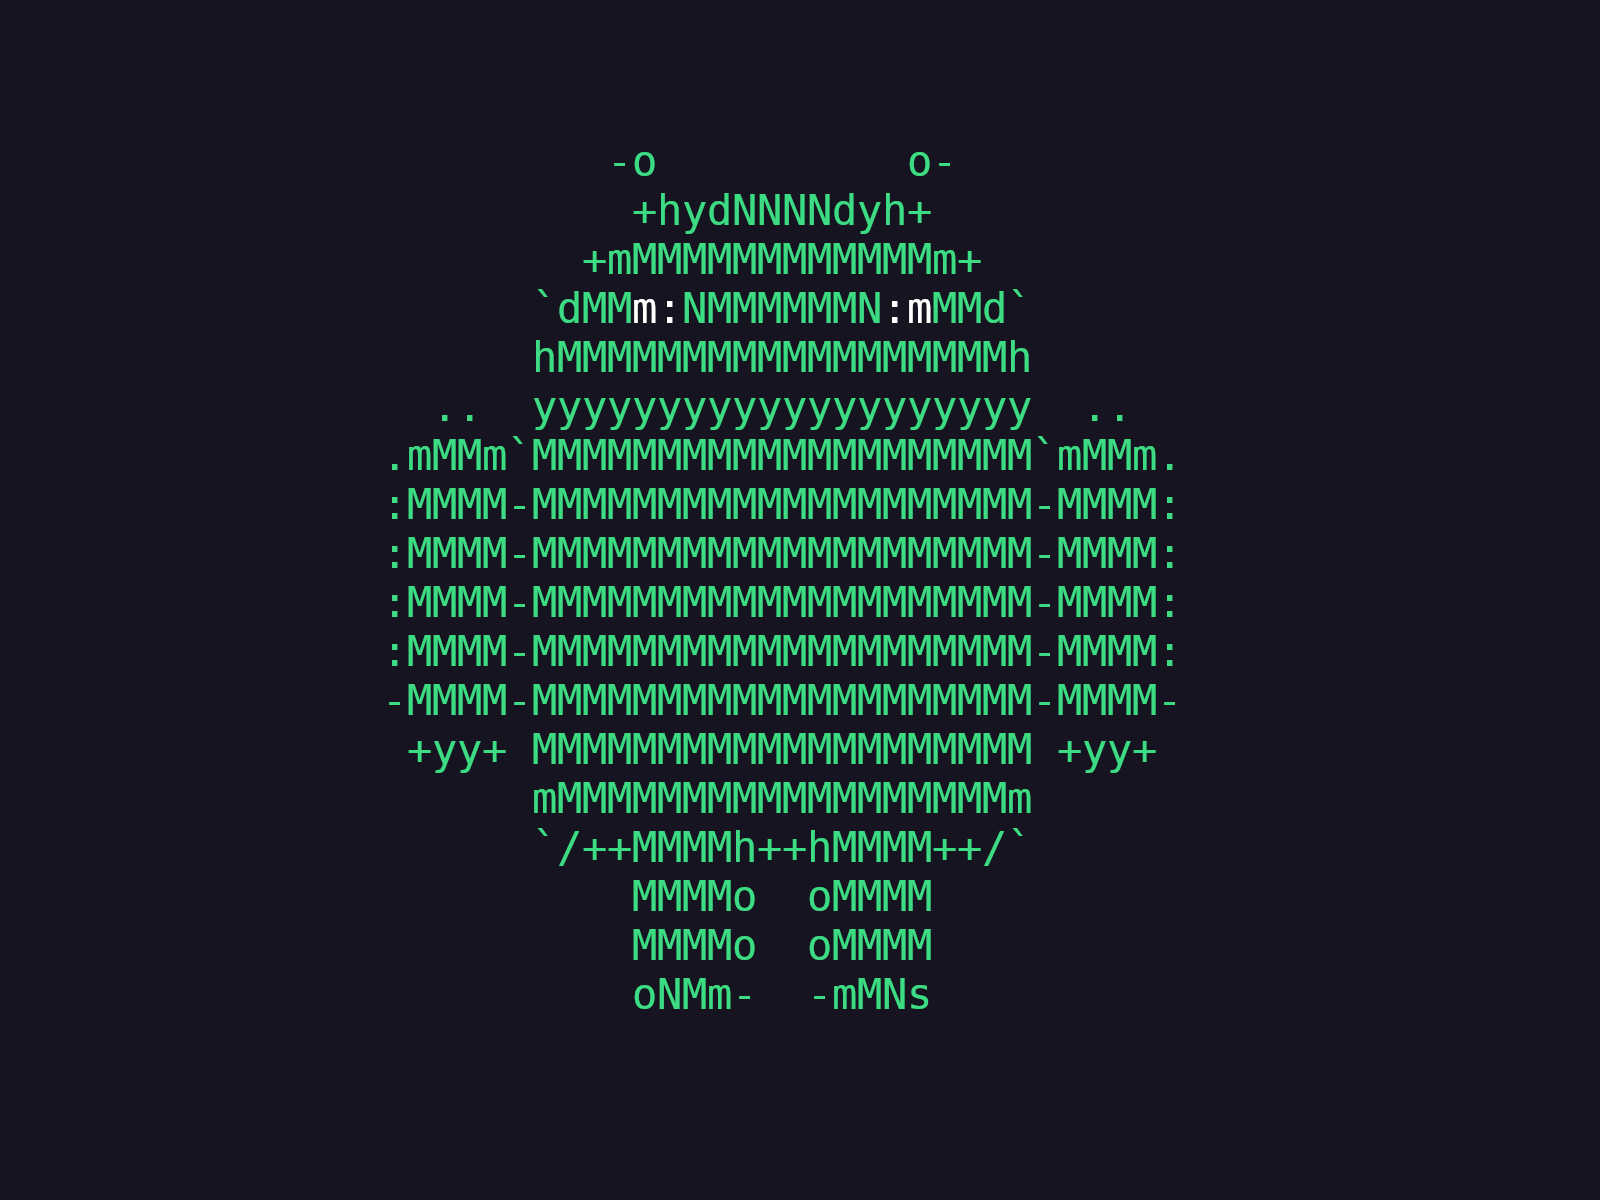
Everybody loves fastfetch for the cool ASCII art logo. You can also use it to verify your username, device model name, and whether the device is connected over ethernet. Install with pkg install fastfetch.
This would also be a good time to install rsync, which will be useful later for synchronizing your website from another computer to the phone.
Cloudflare tunnels
Cloudflare tunnels are the magic that let us host a publicly accessible website without exposing our outdated (and certainly insecure) phone to the internet.
Step 6: Log in to Cloudflare and create a Cloudflare Tunnel
Create a Cloudflare account if you don’t have one already. Next, we want to create a tunnel. A tunnel is a connection between the public web and a server. We will install the utility “cloudflared” on the phone to handle the connection between Cloudflare and our web server.
Tunnels are available under Protect & Connect -> Networking-> Tunnels. You’ll click “Create Tunnel”. It will ask you to give the tunnel a name. Since a tunnel is a connection to your phone, name it after your phone. For example, I called my Tunnel GS9 because it’s a Galaxy S9.
When you first create the tunnel, you will be given a tunnel token. Save that because you will need to pass it to cloudflared to identify the phone to Cloudflare.
Keep the Cloudflare dashboard open in your web browser so we can monitor the tunnel’s connection. Since we haven’t connected the tunnel yet, the status should say “Down”.
Now back on the phone, install cloudflared by typing pkg install cloudflared.
With cloudflared installed, let’s try to connect the tunnel by typing cloudflared tunnel run --token [your-tunnel-token].
Verify that the tunnel is able to reach Cloudflare. It should now say Status: Healthy.
Then kill cloudflared by typing Control-C and get back to the terminal. The Cloudflare tunnels dashboard will show your tunnel status as Down again.
Step 7: Start cloudflared on boot
We want to start the Cloudflare tunnel when the device boots, just as we have with the SSH server.
So very similarly, we will navigate to ~/.termux/boot/. We’ll take the same command we used to connect and verify the tunnel connection and wrap it in a bash script called start-cloudflared.
#!/data/data/com.termux/files/usr/bin/sh
termux-wake-lock
cloudflared tunnel run --token [your-tunnel-token]
Remember to make it executable with chmod +x start-cloudflared.
Now reboot the phone. Verify from the Cloudflare dashboard that the tunnel is working. If the status of the tunnel is still Down, manually run your boot script by typing ~/.termux/boot/start-cloudflared to ensure the script is executable and free of errors.
Later, we will add a “Route” to our Tunnel, but first we need a web server so the Route has something to connect to.
Set up Caddy web server
Step 8: Install Caddy, create the directory for our website
Let’s go ahead and install Caddy using pkg install caddy.
Before configuring our web server, we need to create the directories where our website’s files live. I created a directory named for the website’s domain, so I run mkdir ~/confabulator.xyz. You can use the name of your domain, or something generic like “public”, “www”, or “site”.
We should have something for the server to, y’know, serve. So add an index.html file in the directory of your website. If you’re lacking imagination, just put a Hello World page:
<!DOCTYPE html>
<html>
  <body>Hello, World!</body>
</html>
Step 9: Configure Caddy
Caddy uses a configuration file called the Caddyfile. Create the Caddyfile in ~/.config/caddy/Caddyfile using nano ~/.config/caddy/Caddyfile.
Here’s my Caddyfile:
:8080 {
# Replace confabulator.xyz with the name of your directory
    root * /data/data/com.termux/files/home/confabulator.xyz
    file_server
    encode zstd gzip
}
This is close to the simplest Caddyfile possible. Even if you’ve never seen a Caddyfile, you can guess what this does. It sets a root directory, sets itself up as a file server for the static website, and enables compression.
We’re serving the website from a high port number because Android won’t let us use port 80, in the same way that the SSH port number for Termux is 8022 instead of the usual 22. This doesn’t matter because the Cloudflare tunnel lets us connect to any arbitrary port. Also it’s worth pointing out that the server isn’t handling any SSL encryption. Instead that will be handled by the Cloudflare tunnel.
Now that we have a Caddyfile, let’s make sure that it’s valid and free from typos. Test out the Caddyfile with caddy validate --config ~/.config/caddy/Caddyfile.
If that command doesn’t return any errors, then let’s move on and make sure Caddy will run with caddy run --config ~/.config/caddy/Caddyfile.
From another computer, test to make sure the web server is working with curl. Type curl your-phone-ip:8080 and you should see the HTML Hello World page or whatever index.html file your place in your root directory.
If that works and looks good, type Control-C to kill it. Now we’ll set it up as a background process that runs on boot.
Step 10: Start Caddy on boot
This is now the third time we’ve set up a service to start on boot, so it’s getting familiar. We need to make a script that can be executed by Termux:Boot which lives in ~/.termux/boot/.
And again our script begins by calling termux-wake-lock to ensure the phone doesn’t go to sleep while running Caddy.
#!/data/data/com.termux/files/usr/bin/sh
termux-wake-lock
caddy run --config ~/.config/caddy/Caddyfile
Reboot the phone and then reconnect and verify the server is working by typing curl http://localhost:8080. You should see the HTML index page we saved in the previous step.
Putting it all together
We have a phone running the Caddy web server with a Hello World page. We have a Cloudflare tunnel set up using cloudflared. And it all runs on boot. Now we have to connect the tunnel to our web server.
Step 11: Set up the domain
You will need to make modifications to your web domain to allow for Cloudflare to manage the DNS records. You can buy a domain directly from Cloudflare, but if you already have a domain like I did, navigate to Domains -> Transfers and click on “Onboard domain”. You don’t have to actually complete the transfer, meaning you can keep paying for your domain at it’s original registrar, but onboarding the domain will allow Cloudflare Tunnels to automatically create DNS records as you create Routes.
Type in your domain name, select Next, and then select the Free plan. It will import any existing DNS records and then you can click “Continue to activation”. Cloudflare will then give you the addresses to two name servers. Copy those and then update the name servers for your domain at your domain registrar.
From that moment on, Cloudflare will be managing the DNS records for your domain. It will be able to connect your domain (or subdomains) to tunnels.
Step 12: Set up the route
Back in Protect & Connect -> Networking -> Tunnels, go ahead and click on the tunnel you created earlier (status should still say “Healthy”). In the top navigation tabs, next to Overview, click on “Routes”.
Routes are connections between a domain (or subdomain) and an application (or website) hosted on our phone.
Click on “Add Route”.
Choose “Published application”. I find that name a little confusing, but in this case our running Caddy server is considered published application.
Choose the subdomain (or blank default) for your domain.
Then for Service URL, enter http://localhost:8080. This is the same URL we entered into our test curl command in step 10 because this is what cloudflared sees while running on the phone.
Then click “Add route” at the bottom of the sheet to confirm. It will take some time to set up the DNS record for your domain (or sub-domain).
Then enter your URL into a browser. In my case https://confabulator.xyz. You should see your Hello World index page (or whatever you chose to put in your site’s folder).
You now have a public website hosted on a smartphone! It’s a heck of a thing.
Optional: Multiple websites
You could host multiple websites from the same phone this way using the same Cloudflare tunnel and cloudflared on the device.
My configuration acutally has two sites. One is a test/staging site and the other is the production site.
My Caddyfile looks like this:
:8080 {
    root * /data/data/com.termux/files/home/confabulator.xyz
    file_server
    encode zstd gzip
}
:8081 {
    root * /data/data/com.termux/files/home/test.confabulator.xyz
    file_server
    encode zstd gzip
}
I created two routes. One for confabulator.xyz that points to http://localhost:8080 and one for test.confabulator.xyz pointing to http://localhost:8081.
But you could use this to host as many sites as you like, within reason.
Optional: Set up SD card storage
If your phone has an SD card slot, you can expand your storage. Enable SD card access in Termux by typing termux-setup-storage. Execute this command from the device rather than over SSH. The command will request Android system permissions for file system access, which I learned can’t be granted from a remote SSH session.
Once termux-setup-storage runs successfully, you’ll have a new ~/storage/ directory. If you don’t see the directory, on the phone navigate to Settings -> Apps -> Termux -> Permissions. When I tried this after running termux-setup-storage over SSH, I saw that file permissions were automatically denied for Termux, so I set it to Allow. You may need to set it to Allow and then re-run termux-setup-storage.
The ~/storage directory contains the Android file system, including photos, music, and downloads. The SD card will be the “external-1” directory.
For ease of use, and more elegant-looking file paths, you may want to create a symbolic link or shortcut to your SD card. How you want to organize your files is up to you, but for example you could make the SD card accessible at ~/sdcard with:
ln -s /data/data/com.termux/files/home/storage/external-1 /data/data/com.termux/files/home/sdcard